
Table of Contents
Ready to finally take that big step into starting a blog, website, or professional portfolio? Wondering how to start a blog and register a domain for free? Then you’ve come to the right place.
How to Start a Blog and Register a Domain for Free: What you Need to Know First:
The same way you can build a house and sell it, you can build an online blog or business that generates income for years to come.
Always remember that using marketplaces like Amazon or Etsy means you are building your empire on someone else’s turf. That means, your landlord can change the rent price any time they like.
Even starting a blog on a free platform like Medium or Tumblr subjects you to the whims of their pricing and algorithms. I have seen these tech companies sink budding online businesses overnight with a simple pricing or algorithm change.
If you ever want to make money building a blog or online business, it’s critical you stake our your own land first. I believe .Com domains are actually the land of our time, and will become as valuable and scarce as time goes on.
Should I Use Squarespace or Wix?
I also don’t use Squarespace or Wix, and I don’t recommend you do either.
Why?
Even though their layout might seem easier to use for beginners, both are more expensive long term. I’ve done the math for you, and Bluehost. and WordPress is the most cost effective option.
The goal of this article is to help you build a solid foundation for your next endeavor, and protect you from getting tossed back at square one.
WordPress allows you to manage your site with themes – which change how your website looks – and Plugins, which control how your website functions. Bluehost is one of the most established, reliable companies in the blog hosting industry.
The SEO Advantage of WordPress
More importantly, WordPress will give you a significant advantage when it comes to your website’s search engine optimization.
If you want your blog or website to appear as a top result with search engines (and you should), then you can install the Yoast SEO plugin on WordPress.
This plugin will guide you through everything you need to create a website and blog posts that are search engine friendly. Yoast and WordPress will give you the best possible edge in getting free and organic search traffic.
What is WordPress?
In simple terms, WordPress is a website management interface. WordPress powers over 1/3 of the Internet, including websites for the Whitehouse, Microsoft, and even this blog you are reading right here.
- WordPress.org is the free, open-source WordPress software that you can install on your own web host to create a website that’s 100% your own.
- WordPress.com is a for-profit, paid service that is powered by the WordPress.org software. It’s simple to use, but you lose much of the flexibility of the self-hosted WordPress.
Most of the time, when people say “WordPress”, they mean the self-hosted WordPress available at WordPress.org. If you want to truly own your website, self-hosted WordPress.org is almost always the best option.
What is Hosting?
Web hosting is a service that allows organizations and individuals to post a website onto the Internet. A web host provider provides the technologies and services needed for a webpage to be viewed in the Internet. Websites are hosted, or stored, on special computers called servers. When Internet users type your website address into their browser or click on your domain, their computer will then connect to your server and your webpages will be delivered to them through the browser.
Now, let’s get your hosting set up.
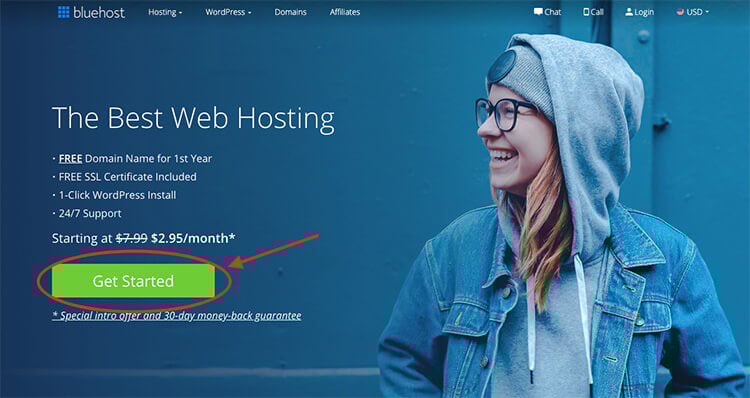
1. Click here to head over to Bluehost and hit the green “Get Started Now” button
2. Choose your plan
First, you’ll select a hosting plan (inputting your blog name comes next). Personally, I recommend choosing the Choice Plus plan because it comes with Domain Privacy, which will protect your personal information (your full name, email address, phone number and home address) from being published anywhere online.
Choosing your plan will look like this right here. Just click the green “Select” button on your plan of choice:
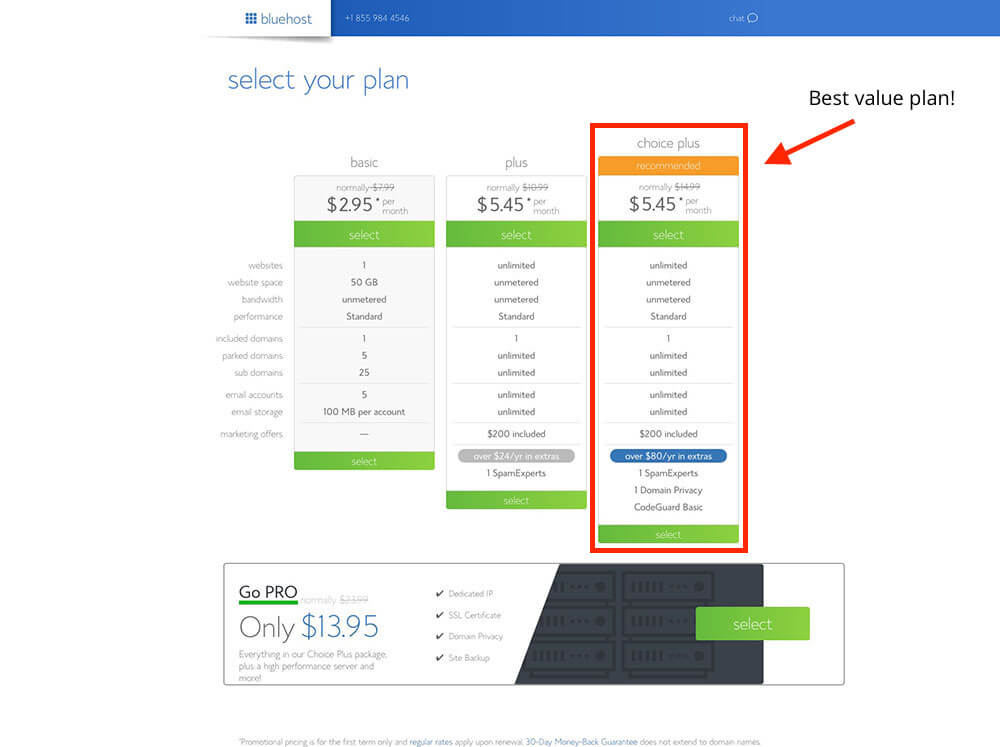
As I said above, I recommend choosing the Choice Plus plan, so that you’re getting the Domain Privacy feature that’ll protect your personal information online, but any of these plans will do as you’re starting your blog—and you can add the domain privacy in later during the checkout process for around $1/mo.
3. Pick your blog’s domain name
Next, you’ll get to the page where it’s time to choose your blog’s domain name:
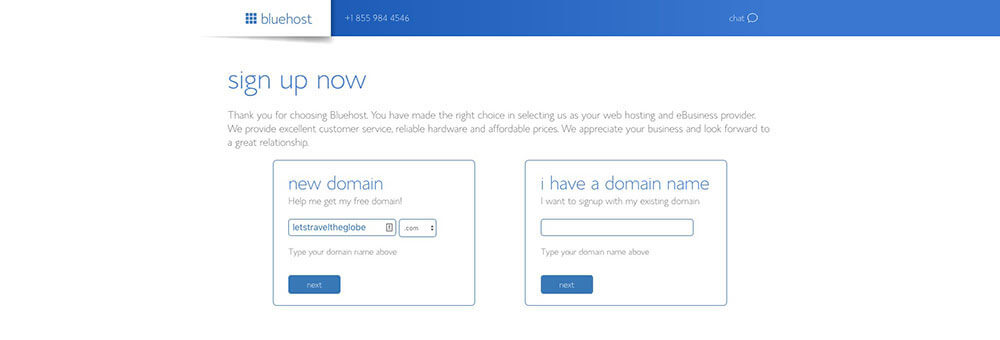
Once you get to this step in the checkout process, just type in the name of the domain name that you’d like your blog to have.
If your domain name of choice isn’t available, you can either try another option that comes to mind—or (what I recommend) select the option to choose your domain name later after getting the rest of your account squared away and taking a little more time to think the name through. Plus, later on down in this guide, I expand some more on how to choose the right name for your blog if you’re not decided yet.
Here’s where you can click to choose your domain later (it’s a popup that will appear if you hover on this page for long enough or move your mouse up toward the top of the page):
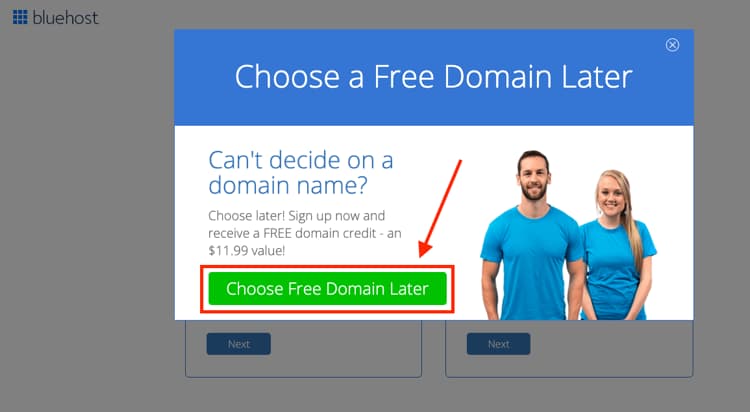
After either choosing your domain name or opting to select it later, you’ll be taken to the final step in the sign up process—creating your account.
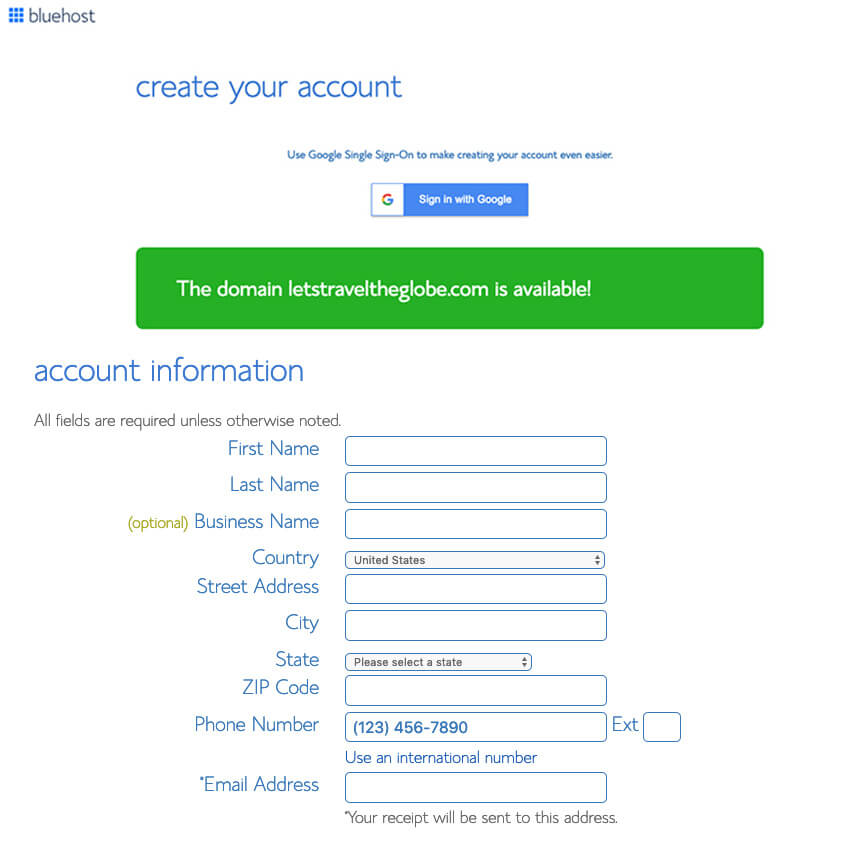
4. Create your Bluehost account
Start by filling in your account details like your name, email address (it’s super important to use an up-to-date email address because this is where your login details and account information will be sent) and address. If you don’t want to enter your information manually, you can connect your Bluehost account with your Google account. Either works!
5. Select the right hosting package
This is where you’ll choose an account plan based on the price you want to lock in and how far in advance you’ll pay.
Note that Bluehost only offers options for you to pay 1, 2, 3 or 5 years upfront. They don’t offer a monthly payment option (because most hosting companies that do offer monthly payments tend to charge a bit more). Even still, with whichever plan you choose, the price works out to be a great deal for starting your own blog and getting it online today.
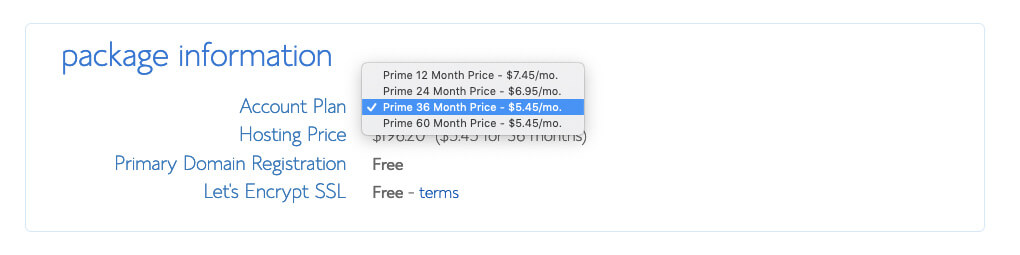
6. Pick your pricing plan
Which pricing plan is best to start a blog with?
Personally, I recommend choosing the “Prime 36 Month Price” if you want to lock in the lowest possible price for your hosting. It secures your blog hosting at their lowest rate (and gets you domain privacy) for the next 3 years. And because this low pricing for new customers only applies to the first payment you make, if you were to choose the 1-year plan, your pricing may go up after that first year.
That’s why if you choose the 36-month plan, your pricing will be locked in at this rate for 3 years. For that reason, I recommend going with the longest duration plan that your budget can spring for.
Choosing the right package extras (skip all but one)
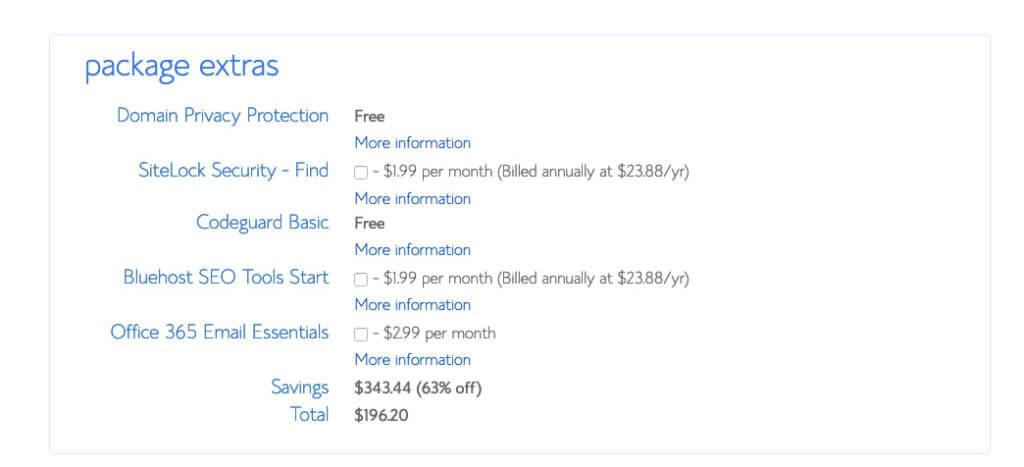
I recommend keeping the Domain Privacy Protection extra, but you can get away with skipping the rest. Later on in this guide, I’ll show you the many free and cheap plugins & tools you can use for things like SEO optimization, additional security and site back-ups, rendering most of the other package extras not necessary.
As I mentioned earlier though, having the domain privacy extra keeps all of your personal contact information (your name, email, phone number and address) private. Now, if you chose the Choice Plus Plan on the previous screen, then your Domain Privacy Protection will be listed as “Free” just like this screenshot above shows—it’s included in that plan.
If you chose a Basic or Plus Plan, then you’ll want to check the box to add Domain Privacy Protection to your order for around $1/mo.
The total you’ll now see is the amount you’re going to pay today. Remember though, you won’t have to pay again for 1, 2, 3 or 5 years depending on the package you chose. Plus, there’s a 30-day money back guarantee in case things don’t go as planned with your blog.
7. Enter your billing information and click ‘Submit’
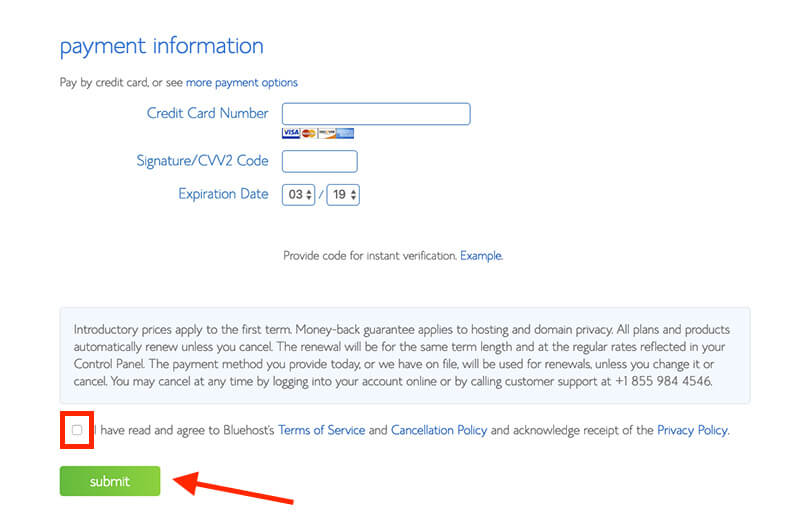
Now you’ll input your billing information, check the box that you agree to Bluehost’s Terms of Service and then hit the green “Submit” button.
Congratulations! You’ve officially completed the first major step in starting a blog.
With the initial signup process complete, it’s time to move into the next stage of getting your blog fully setup and optimized.
On the next page, you’ll be guided step-by-step through the process of getting WordPress installed on your blog through Bluehost.
—> Click here to head over to Bluehost and register your domain if you haven’t already.
Now, if you haven’t yet set up your web hosting and want to check out some other options—there are other web hosting providers worth considering.
Disclosure: Please note that when you purchase hosting using my Bluehost affiliate link, they compensate me, which helps me make all the content I create free to you. Know that I also use Bluehost hosting, and I would never recommend a product, tool or service I don’t personally use & advocate for.
In the interest of giving you all the information, here are a few other hosting options often used and recommended by my contemporaries.
The 2 best alternative blog hosting platforms worth considering:
- Dreamhost
- HostGator